Texts, Shapes and Media
# Design Tokens
Design your model’s canvas in simcision! Use free text, images, and shapes to document, highlight, or enrich areas of your system. A picture is worth a thousand words – and a well-designed model is much easier to understand.
In the toolbar of the impact network, you’ll find three design elements you can place in your network:

# Media
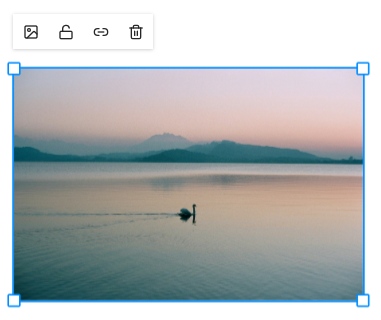
Externally created media can be embedded in simcision models.
Insert new media
- Select the media icon in the toolbar
- Drag a region in the impact network
- Choose a media file to upload
Supported formats
- simcision supports embedding images (PNG, SVG, JPG, WebP, AVIF, GIF, …) and videos (MP4) in the network. Videos are played muted and in a continuous loop.
Edit media
- Media placed in the network can be moved via drag-and-drop, scaled via sides and corners, and rotated using the outer corners.
- Use the lock icon in the toolbar to lock the position and size of media in the network – once locked, media can’t be moved.
- By default, media can only be scaled proportionally (aspect ratio locked). You can toggle this lock via the chain icon.
- You can replace the media via the media icon in the top-left corner.
Note: Media files are often large and can negatively impact loading times and memory usage. Compress all media before inserting it and only use the size you truly need. Modern formats like WebP are generally smaller. Vector files (SVG) can be scaled infinitely and remain sharp.

# Text
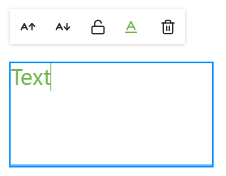
Use free text to document your models directly on the canvas.
Create new text
- Select the text icon in the toolbar
- Drag the desired text area on the canvas
- Write your text directly into the newly created area
Edit text fields
- Text fields can be moved via drag-and-drop, scaled via sides and corners, and rotated via the outer corners.
- Use the lock icon in the toolbar to lock the position and size of text fields – once locked, they can’t be moved.
- Font size can be adjusted via the buttons on the left side of the toolbar.
- Font color can be chosen freely.
- Text can also be formatted using special markup syntax (see formatting options for text fields).

# Shapes
Use shapes to visually highlight areas of your system or create additional images for documentation.
Create new shape
- Select the shape icon in the network toolbar
- (Optional: hold the icon to choose a shape – rectangle, circle, or triangle)
- Drag the shape to your desired size and position in the network
Edit shapes
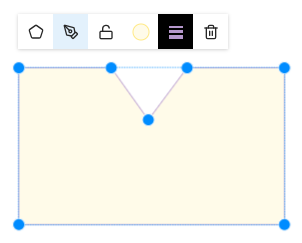
- Shapes can be moved via drag-and-drop, scaled via sides and corners, and rotated via the outer corners.
- Use the lock icon in the toolbar to lock the position and size – once locked, shapes can’t be moved.
- Use the button in the left corner of the toolbar to change the shape type. Note: Switching types will overwrite the current shape.
- You can customize fill color, border color, opacity, and line thickness via the buttons in the middle of the toolbar.
- Colors can be entered as hex codes or selected via a color picker directly from the model.
- Use the pen icon to activate shape edit mode. In this mode, you can freely move all anchor points of the shape.
Helpful shortcuts in shape edit mode:
- Right-click on an anchor point to smooth or round it. Rounding gives the point Bezier handles.
- Double-click a point to delete it.
- Double-click the edge of the shape to create a new anchor point.
- Hold Shift while dragging a point to constrain it to a horizontal or vertical axis.
- Hold Alt while dragging a Bezier handle to move its opposite symmetrically.
- Hold Ctrl while dragging a Bezier handle to fix its angle relative to the anchor point.
- Hold Shift while dragging a Bezier handle to snap it to 45° angles.
Note: A shape with fewer than two points will be automatically deleted.

