
Scenes
# About Scenes
Scenes will be available in simcision 3.10+. That version will be published in March.
🔒 Scenes are an advanced feature and are only available to users with a paid simcision subscription.
With scenes, you can divide your model into multiple visually separated areas. In each area, you can place your own elements and relationships, add text, and embed media.
During the simulation of the model, the content of all your scenes is calculated. You can create connections between your scenes by using the same elements in multiple scenes—the state of your elements is shared across all scenes and is influenced by all relationships and flows from every scene.
Scenes help you to…
- Model systems from different perspectives
When looking at a system from different viewpoints, rearranging its elements can help present relationships more clearly. With scenes, you can reorganize the same network and, for example, display only the relationships that originate from a specific perspective.
Example: The element “Forest Stock” plays a role in the perspective of “Forestry,” but also in the perspective of “Urban Planning.” Depending on the perspective, new relationships and a different context emerge for the element. - Create individual dashboards
Especially when building playable simulations, you may want precise control over what players can see. Scenes allow you to place your entire game system—including all relationships, flows, and auxiliary values—on one scene, and design the actual game interface as a “dashboard” on another.
You might want to create a compact “control center” that mainly contains sliders for your elements. Or perhaps a data view that primarily displays charts to provide context about what has happened during the simulation. In public links with access control, you can define which of your scenes your players are allowed to access.
Good to know: Scenes significantly increase the complexity of your models if you distribute the functional parts of your system across them. It becomes harder to trace why a value has changed, since not all relationships and influencing factors are always visible. Consider carefully how scenes support your goal before using them.
# Szenenleiste
You can find the scene bar in the lower right corner of the workspace. All settings available there are linked to the respective scene.
- Scene Management
Here you can select and manage your scenes. - Scene Design
Choose the background image, background color, font size, and template of your scene. - Zoom
Define the zoom level of the currently open scene. - Visibility
Choose what should be visible in the scene: relationships, flows, index connections, guiding question, … - Layers
Manage the layers of your scene and define what is visible or locked. - Fullscreen
Open simcision in fullscreen mode.

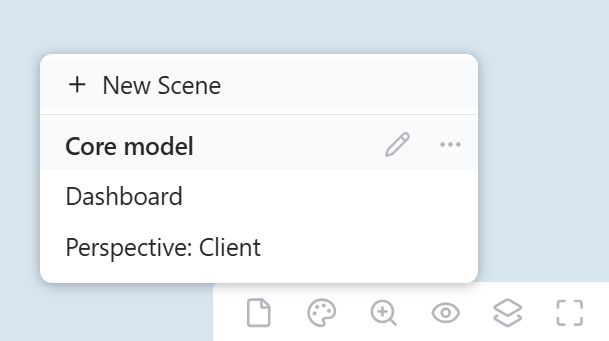
Scene Management
Here you can set up and organize the scenes of your model.
- Select “New Scene” to create a completely new, empty scene in your model. The scene is selected immediately, and you can start adding content right away.
- You can double-click on scene entries or click the pencil icon to edit their names.
- Using the context menu under “…” you can duplicate or delete a scene.
- Drag & drop scenes to reorder them.
- As long as you only have one scene, the scene bar displays only the scene icon. Once you have multiple scenes, their titles are shown there. You can change this setting by right-clicking on the scene icon.
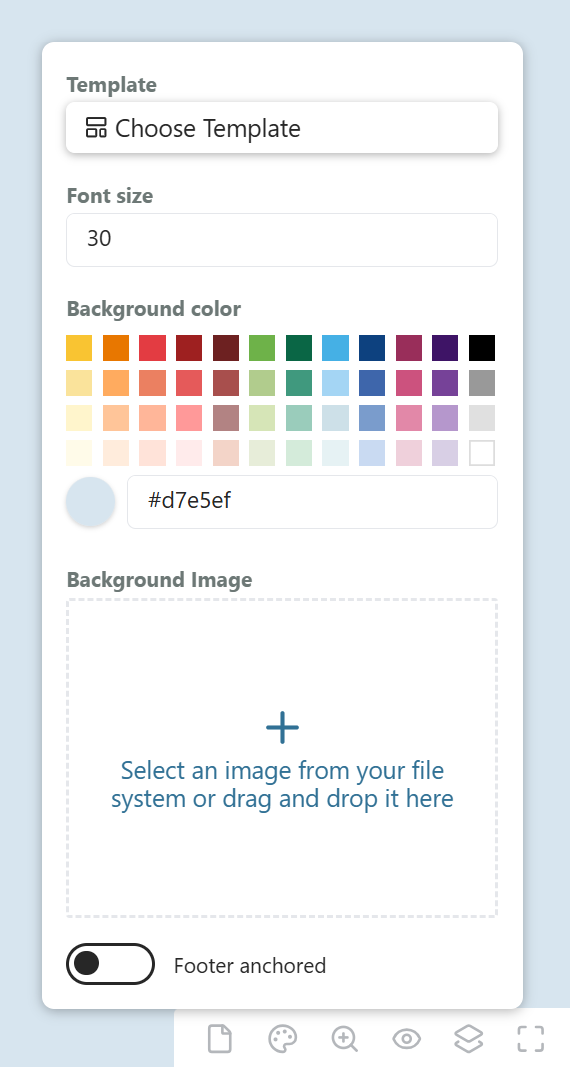
Scene Design
Use this menu to customize the background of your scene. Each scene can have its own color scheme and background images.
Settings:
- Template
Templates provide a fixed layout displayed behind your network, allowing you to quickly create elements following a predefined structure.
Templates contain placeholders and sections:
Placeholders: Clicking a placeholder creates an element at that position.
Areas: Areas divide the network into visual segments. Each section has a name, which can be renamed in the template menu.
The template can be deactivated at any time, existing elements will not be affected. - Font Size: You can define a base font size for your scene. All texts in the network will scale accordingly. However, many text elements can also define their own individual font sizes.
- Background Color: Defines the color of the workspace.
- Background Image: The selected background image is placed behind all objects in the network. It does not move when you pan or zoom the workspace. You can choose whether it is displayed in full, scaled to fill the workspace, or shown in its original size.
- Footer Anchored: By default, the bottom panel overlays the network. Optionally, it can reserve its own space below the workspace, which will then reduce the size of the workspace accordingly.
Zoom
In this section, you can adjust the zoom level of the selected scene. By default, a slider is displayed. You can customize the menu via right-click to show only buttons or an input field instead.

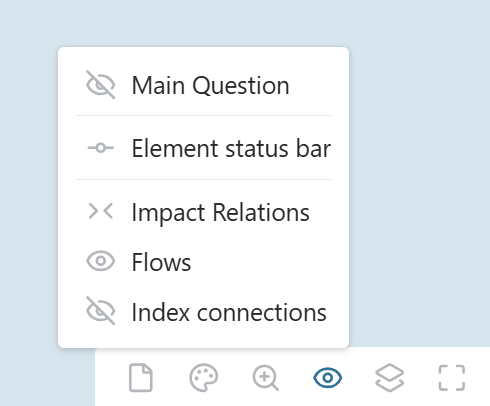
Visibility
In the scene visibility menu, you can define what is visible in the current scene. You can show or hide connections, display or hide the central guiding question, and control what information is shown inside elements.
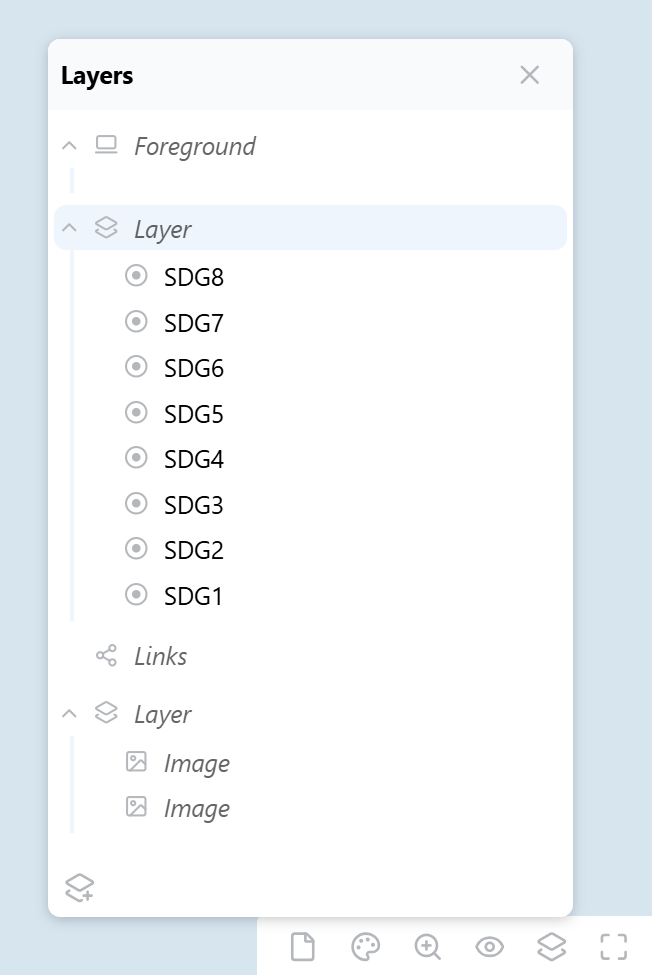
Layers
Each scene is divided into layers. Layers allow you to group objects within a scene and show or hide them collectively.
There are three types of layers:
- Foreground Layer:
This layer sits above all others. Only elements are displayed here.
Elements in this layer are not part of the main impact network. Instead, they are displayed in lists at the edge of the workspace. This is useful for consumption resources and key values that need to remain visible at all times. - Scene Layer
This is the standard layer containing all network objects: elements, text, shapes, charts, and images.
You can change the display order of objects here by reordering them via drag & drop. Items higher in the list are shown further in the foreground in the workspace. - Connection Layer
This layer contains all system connections: relationships, flows, and index links.
Functions in the Layer Menu:
- You can group objects within scene layers if you need more structure.
- Groups and layers can be hidden, which will hide all objects they contain.
- Groups and layers can also be collapsed for a cleaner structure.
- All objects and layers can be locked. Locked objects can no longer be moved. If a layer is locked, none of its objects can be clicked.
- You can create a new layer using the button at the bottom of the layer menu. Only scene layers can be created. The foreground layer and the connection layer are created automatically and cannot be deleted.
- When you select a scene layer, all newly created objects (elements, media, text, etc.) will automatically be placed on that layer.
# Scenes in publications
If you have created scenes, you can restrict their visibility when publishing your model. Anyone who opens your model via that public link will not have access to hidden scenes and can only choose from the available options.
🔒 Scenes are a Pro feature and are only available with a paid simcision subscription. In addition, the “Public Link Configuration” upgrade is required to enable visibility settings for published models.
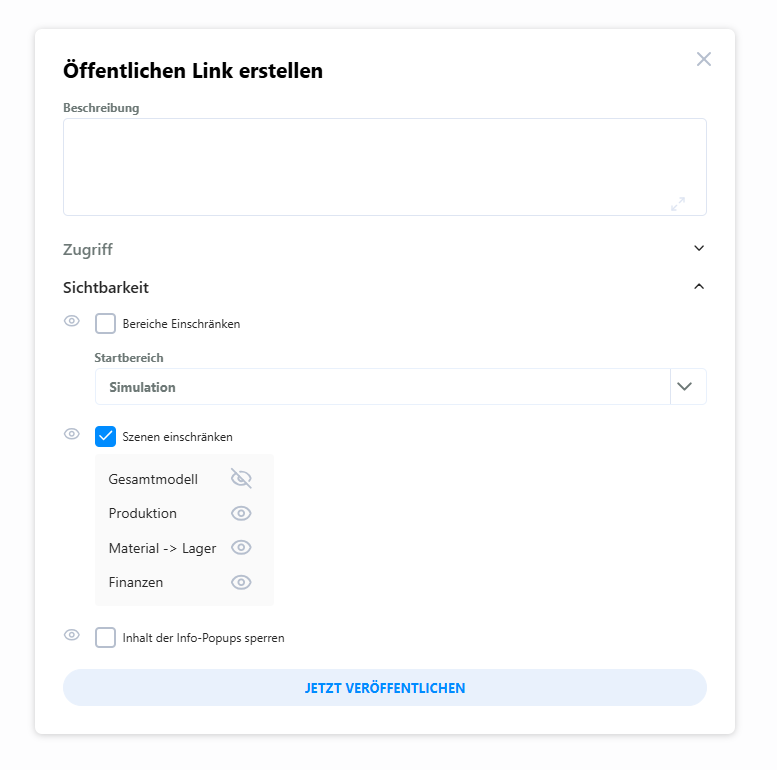
Please note: Restrictions on public links apply only to public access. If the model is shared with permission to duplicate, the duplicated model has no restrictions—full access to all areas and scenes is possible. If you want to prevent this, you should not allow the model to be duplicated.