Conditions
# About conditions
A condition is a small query that is executed during a running simulation. If the result of the query is correct, the condition is considered fulfilled.
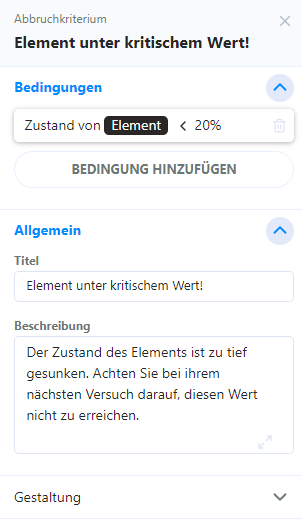
Conditions are used to determine when events occur, measures can be played or under which circumstances a scenario ends prematurely.
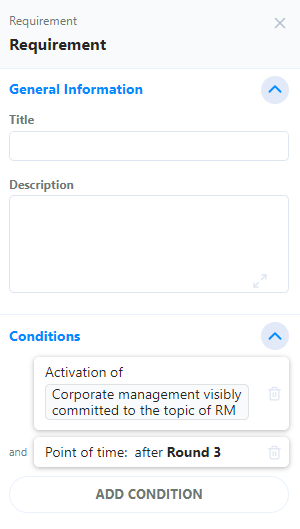
They are therefore always a fixed part of an object: an action, the trigger of an event or a scenario termination criteria. Conditions can be created in the respective menu of these objects.
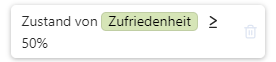
Example: The “Party” action should only be able to be used if the status of the “Satisfaction” element is above 50%. A condition can be assigned to the action to check this status. As soon as the action is used, the condition compares the status of the element with the target value (50%) – if it is higher, the condition is considered fulfilled and the action can be used. If it is lower, the action is prevented.
# Build up conditions
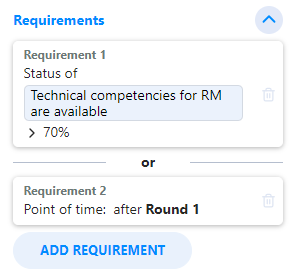
Almost every condition is a comparison between two values.
Examples:
- Is the state of the “Satisfaction” element above 50%?
- Is the simulation in round 2?
- Is the value of the resource “Debt” lower than the value of the resource “Budget”?
These comparisons always consist of three components:
| The comparison source | The comparison | The comparison value |
|---|---|---|
| The state of the element “satisfaction” | > (is greater than) | 50% |
| the time of the simulation | = (is) | Round 2 |
| the value of the resource “debt” | < (is smaller than) | the value of the budget resource |
The condition can be composed of these different components in the conditions menu. Many different possible queries can be defined according to this logic.
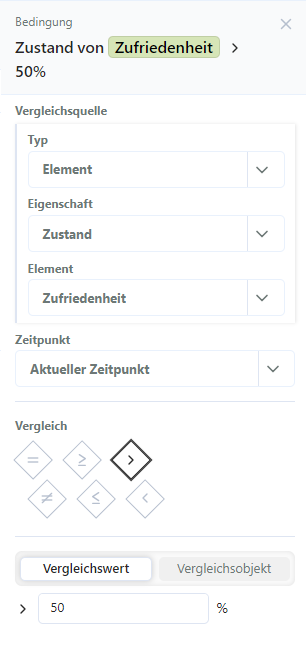
# Comparison source
The comparison source specifies which state of my model is to be queried.
For example: The time of the system, the state of the “Satisfaction” element, the activation number of the “Investigation” measure.
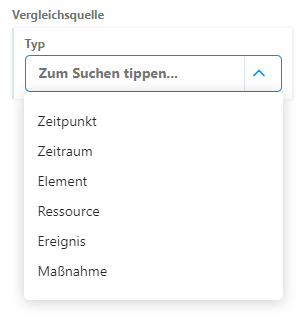
The source often consists of three options: Type, Property and Object. (More or less depending on the selection).
First, we determine the type. This narrows down which aspect of the model is considered. Depending on the type selected, further properties are then available for selection.
Available types:
- Point of time
- Time period
- Target
- Resource
- Index
- Event
- Action
Depending on the selected type, a property and an object can then be selected to narrow down the initial value more precisely.
For some comparison sources, a comparison time can also be determined. This point in time determines at which point in the simulation the query is carried out. This can either be the current time, but also a fixed time (round 1) or a relative time (2 rounds ago), based on the current simulation time.
For some comparison sources, a time period can also be specified here (e.g. for event activations).

# Comparison
There are 8 different comparison operators. These comparison commands can be used to set how the relationship between the comparison source and the comparison value should be so that the condition applies.
The comparison is preselected, but can be changed for all conditions.
| = | Both values must be exactly the same for the condition to apply |
|---|---|
| ≠ | Condition applies as long as both values are not exactly the same |
| ≥ | Applies if the comparison source is greater than or equal to the comparison value |
| ≤ | Applies if the comparison source is less than or equal to the comparison value |
| > | Applies if the comparison source is greater than the comparison value |
| < | Applies if the comparison source is smaller than the comparison value |
| ✓ | Exists/is correct: This checks whether the comparison value is basically correct. Example activation: “Has there been an activation?” Example period: “Are we in this period?” Example last activation date: “Has it already been activated?” |
| x | Does not exist/does not apply: This is used to check whether the comparison value does not apply in principle. Example activation: “Was there no activation?” Example period: “Are we outside this period?” Example last activation date: “Has it never been activated?” |
Not all comparison types are available for all types/properties.

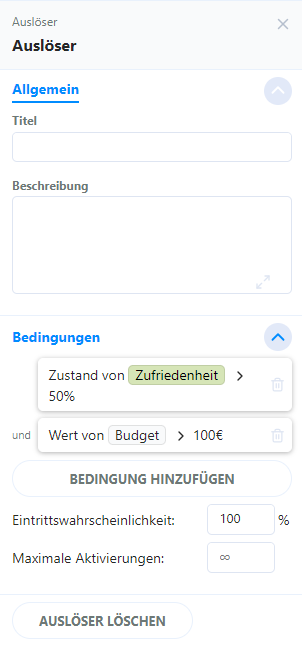
# Comparison Value
The comparison value is compared with the comparison source in the condition.
Either a static value can be entered here (as with the condition of “Satisfaction” > 50%) or a comparison object can be selected. The selection of the comparison object works according to the same principle as the selection of the comparison source (first type, then property, then object). The comparison object can be used to compare two dynamic values of the system (e.g.: state of “Satisfaction” > state of “Adventurousness”).
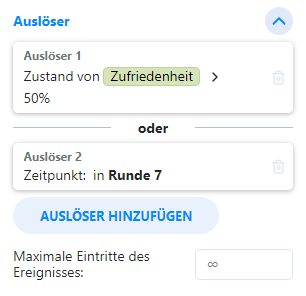
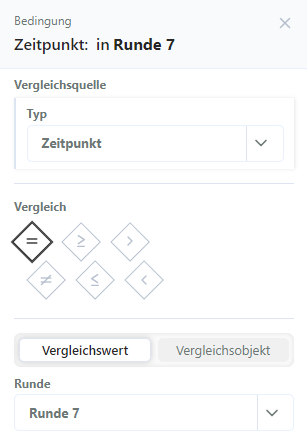
# Point of time condition
Point of time conditions have a very simple structure: Here you can check whether the current simulation has reached a certain point in time.
Point of time comparisons are displayed in text form in condition lists.

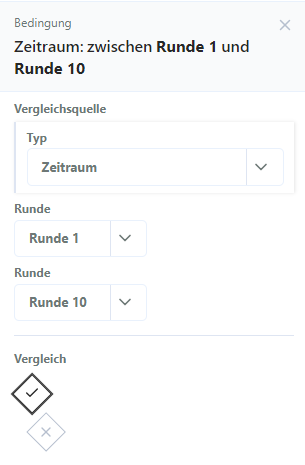
# Time Period condition
The time period condition checks whether the current time of the simulation is within the specified range. This includes the start and end.
All time values that are possible in the system context are available as selection options for start and end. The time unit of the simulation is also used here.
Only a simple comparison is possible here: either the condition applies or not.
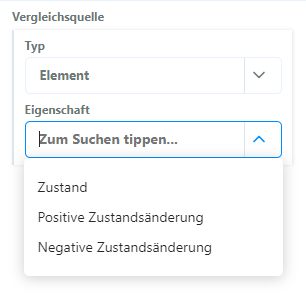
# Element condition
There are three properties to choose from for an element condition:
Status
This property can be used to check the value of the element status.
Example: Is the status of “Satisfaction” above 50%?
Positive change of status
For the positive change of status, the status of the element is compared in two rounds. (Value in round B – value in round A). If the value in round B is higher than in round A, there has been a positive change in status – this can be queried.
Example: Has the positive change of status “Satisfaction” been over 10% since round 2?
(Applies if the status of the “Satisfaction” element was at least 10% lower in round 2 than at the time of the query)
The two comparison rounds can be chosen freely.
Negative change of status
For the negative change of status, the status of the element is compared in two rounds. (Value in round A – value in round B). If the value in round A is higher than in round B, there has been a negative change in status – this can be queried.
Example: Has the negative change of status “Satisfaction” been over 10% since round 2?
(Applies if the status of the “Satisfaction” element was at least 10% higher in round 2 than at the time of the query)
The two comparison rounds can be chosen freely.
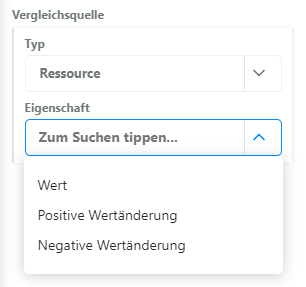
# Resource condition
![]()
There are three properties to choose from for a resource condition:
Value
This property can be used to check the value of the resource.
Example: Is the value of “Budget” over €500?
Positive change in value
For the positive change in value, the value of the resource is compared in two rounds. (Value in round B – value in round A). If the value in round B is higher than in round A, there has been a positive change in value – this can be queried.
Example: Has the positive change in the value of “Budget” been over €10 since round 2?
(Applies if the value of the resource “Budget” was at least €10 lower in round 2 than at the time of the query)
The two comparison rounds can be chosen freely.
Negative change in value
For the negative change in value, the status of the resource is compared in two rounds. (Value in round A – value in round B). If the value in round A is higher than in round B, there has been a negative change in value – this can be queried.
Example: Has the negative change in the value of “Budget” been over €10 since round 2?
(Applies if the value of the resource “Budget” was at least €10 higher in round 2 than at the time of the query)
The two comparison rounds can be chosen freely.
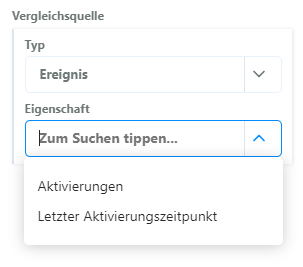
# Event condition

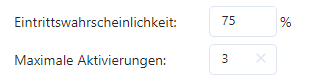
The event condition can be used above all to query when and how often an event has occurred in the course of the simulation to date.
Two properties are available:
Activations
Measures the number of activations of the event in a certain period of time.
Example: Activations of flash flood > 3?
(Has the “flash flood” event occurred more than three times since the start of the simulation?)
The time period can be freely determined.
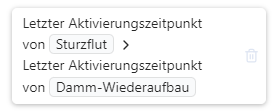
Last activation time
The last activation time can be used to find out whether a measure or event was activated after another one.
Example: Was the last activation time of the flash flood after the last activation time of the dam reconstruction?
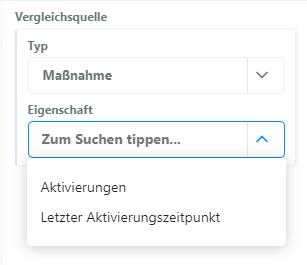
# Action condition

The action condition can be used primarily to query when and how often an action has occurred in the course of the simulation to date.
Two properties are available:
Activations
Measures the number of activations of the action in a given period.
Example.: Activations of dam construction > 3?
(Has the “Dam construction” action been used more than three times since the start of the simulation?)
The time period can be freely determined.
Last activation date
The last activation time can be used to find out whether an action or event was activated after another one.
Example: Was the last activation time of the flash flood after the last activation time of the dam reconstruction?